#include <stdio.h>
#include <stdlib.h>

#include <wiringPi.h>
#include <wiringPiSPI.h>

#define L6470_SPI_CHANNEL 0

// 関数プロトタイプ。
void L6470_write(unsigned char data);
void L6470_init(void);
void L6470_run(long speed);

int main(int argc, char **argv)
{
 int i;
 long speed = 0;

 printf("***** start spi test program *****\n");

 // SPI channel 0 を 1MHz で開始。
 if (wiringPiSPISetup(L6470_SPI_CHANNEL, 1000000) < 0)
 {
  printf("SPI Setup failed:\n");
 }

 // L6470の初期化。
 L6470_init();

 while(1)
 {
  for (i = 0; i < 5; i++)
  {
   speed += 10000;
   L6470_run(speed);
   delay (5000);
  }
  for (i= 0; i < 5; i++)
  {
   speed -= 10000;
   L6470_run(speed);
   delay (5000);
  }
 }

 return 0;
}


void L6470_write(unsigned char data)
{
 wiringPiSPIDataRW(L6470_SPI_CHANNEL, &data, 1);
}

void L6470_init()
{
 // MAX_SPEED設定。
 /// レジスタアドレス。
 L6470_write(0x07);
 // 最大回転スピード値(10bit)
 L6470_write(0x00);
 L6470_write(0x20);

 // KVAL_HOLD設定。
 /// レジスタアドレス。
 L6470_write(0x09);
 // モータ停止中の電圧設定(8bit)
 L6470_write(0xFF);

 // KVAL_RUN設定。
 /// レジスタアドレス。
 L6470_write(0x0A);
 // モータ定速回転中の電圧設定(8bit)
 L6470_write(0xFF);

 // KVAL_ACC設定。
 /// レジスタアドレス。
 L6470_write(0x0B);
 // モータ加速中の電圧設定(8bit)
 L6470_write(0xFF);

 // KVAL_DEC設定。
 /// レジスタアドレス。
 L6470_write(0x0C);
 // モータ減速中の電圧設定(8bit)
 L6470_write(0xFF);

 // OCD_TH設定。
 /// レジスタアドレス。
 L6470_write(0x13);
 // オーバーカレントスレッショルド設定(4bit)
 L6470_write(0x0F);

 // STALL_TH設定。
 /// レジスタアドレス。
 L6470_write(0x14);
 // ストール電流スレッショルド設定(4bit)
 L6470_write(0x7F);
}

void L6470_run(long speed)
{
 unsigned short dir;
 unsigned long spd;
 unsigned char spd_h;
 unsigned char spd_m;
 unsigned char spd_l;

 // 方向検出。
 if (speed < 0)
 {
  dir = 0x50;
  spd = -1 * speed;
 }
 else
 {
  dir = 0x51;
  spd = speed;
 }

 // 送信バイトデータ生成。
 spd_h = (unsigned char)((0x0F0000 & spd) >> 16);
 spd_m = (unsigned char)((0x00FF00 & spd) >> 8);
 spd_l = (unsigned char)(0x00FF & spd);

 // コマンド(レジスタアドレス)送信。
 L6470_write(dir);
 // データ送信。
 L6470_write(spd_h);
 L6470_write(spd_m);
 L6470_write(spd_l);
}
2012年9月22日土曜日
Raspberry Pi でSPI ストリナステッピングモータドライバ
ArduinoのSPIでストリナのSPI接続ステッピングモータドライバを動かせた ので、同じ事を Raspberry Piでもできないか調べてみました。Raspberry PiでのSPIはドライバをインストールすればI2Cのようにファイルディスクリプタでアクセスできるようですが、いつも使わせてもらっている GordonさんとことのwiringPiにラッパー関数があったので、それを使わせてもらうことにしました。SPIのドライバをインストールする方法も同サイトに記述があります。

2012年9月17日月曜日
Arduino でラジコンサーボ(インチキレンジファインダ)
Arduino と ストリナのドライバで ステッピングモータを回せた ので、次はラジコンサーボを動かしてみようと思います。といっても、Arduinoにはラジコンサーボ用のライブラリがあるので、単純に動かすだけなら線をつないで簡単にできてしまいます。以前、H8やSHを使って、サーボモータを動かしたときは、駆動用のパルスから自分で生成しないといけないので面倒でした(まあ、パルスの周期などでトルクなどを細かく変えたり自由度は高いですが)。
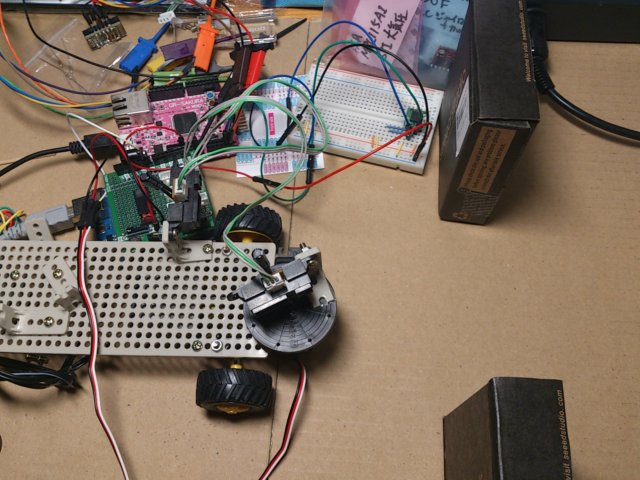
ただ、サーボを回すだけだと面白く無いので、サーボホーンに(とりあえず両面テープでだけど)PSD距離センサを貼り付けて動かしてみました。
当初、動かすのが速すぎて、距離がうまく取れませんでした。GP2D12のデータシートを見たら、ちゃんと、最大50msほど測定にかかると書いてありました。そこで、一点で停止→100ms待ち→測定→次の点へを繰り返すようにしました。
正面20cmくらいのところに壁がある状態で、こんな感じの測定結果。

壁は正面に垂直に対していますが、距離センサが軸を中心に回転して測定するので、両端は当然距離が長くなります。なんとなく良い感じでとれてるかな。
次に、こんな感じで正面に障害物を置いてみると


真ん中の凹んで(距離が短くなって)いる部分が障害物。
さらに、正面だけ開いている状態だと


真ん中だけ、距離が大きくなってます。思ったよりもいい感じ。
これを簡易レンジファインダとして移動ロボットに載せたりできないかな?あいかわらず、具体的な使い道を考えずに、突発的にやっているだけなんだけど。
ただ、サーボを回すだけだと面白く無いので、サーボホーンに(とりあえず両面テープでだけど)PSD距離センサを貼り付けて動かしてみました。
当初、動かすのが速すぎて、距離がうまく取れませんでした。GP2D12のデータシートを見たら、ちゃんと、最大50msほど測定にかかると書いてありました。そこで、一点で停止→100ms待ち→測定→次の点へを繰り返すようにしました。
正面20cmくらいのところに壁がある状態で、こんな感じの測定結果。
壁は正面に垂直に対していますが、距離センサが軸を中心に回転して測定するので、両端は当然距離が長くなります。なんとなく良い感じでとれてるかな。
次に、こんな感じで正面に障害物を置いてみると

真ん中の凹んで(距離が短くなって)いる部分が障害物。
さらに、正面だけ開いている状態だと
真ん中だけ、距離が大きくなってます。思ったよりもいい感じ。
これを簡易レンジファインダとして移動ロボットに載せたりできないかな?あいかわらず、具体的な使い道を考えずに、突発的にやっているだけなんだけど。
#include <Servo.h>

// PSDセンサのアナログ信号入力ピン。
const int PIN_PSD_IN1 = 5;

// センサの近接側測定不可領域閾値。
const int PSD_DEADZONE = 80;

// 待ち時間。
const int WAIT_TIME = 100;

Servo servo1;

// 電圧をcmに変換。
int analogToCentimeter(int analogValue) {
  return (int)((6787 / (analogValue -3)) -4 + 5);
}

void setup()
{
  Serial.begin(9600);
  Serial.println("Servo set center");
  servo1.attach(9);
  servo1.write(90);
  delay(2000);
}

void loop()
{
  int i;

  for (i = 30; i <= 150; i += 10)
  {
    servo1.write(i);
    delay(WAIT_TIME);
    // センサのアナログ値を読み取り。
    int value1 = analogRead(PIN_PSD_IN1);

    // 読み取り値が閾値を超えていれば、距離に変換。
    if (value1 > PSD_DEADZONE) {
      int range1 = analogToCentimeter(value1);

      // シリアルへ出力。
      Serial.print(i, DEC);
      Serial.print(", ");
      Serial.print(range1, DEC);
      Serial.println();
    }
    else {
      Serial.println("RANGE OUT, ");
    }
  }
  for (i = 150; i >= 30; i -= 10)
  {
    servo1.write(i);
    delay(WAIT_TIME);
    // センサのアナログ値を読み取り。
    int value1 = analogRead(PIN_PSD_IN1);

    // 読み取り値が閾値を超えていれば、距離に変換。
    if (value1 > PSD_DEADZONE) {
      int range1 = analogToCentimeter(value1);

      // シリアルへ出力。
      Serial.print(i, DEC);
      Serial.print(", ");
      Serial.print(range1, DEC);
      Serial.println();
    }
    else {
      Serial.println("RANGE OUT, ");
    }
  }

}
ストリナのSPIステッピングモータドライバ
今回の小物は ストロベリーリナックスさんのSPI接続ステッピングモータドライバ です。以外にも?自分はステッピングモータを使ったことがありませんでした。モータというとDCモータばかりです。いつもガラクタを作るのに使うのはタミヤの工作用ギアボックスなんかに入っている小さいやつですし、パワーが欲しい場合はタミヤの遊星ギヤ付きモーターとか。以前仕事で使ったMAXONのエンコーダ付きモータは大きさ(細さ)に比してトルクが大きくて素晴らしいですが、値段とか入手性を考えると日曜電子工作にはちょっと・・・ね。あとは、ぐるぐる回らなくていいなら、ラジコンのサーボですよね。オープン(センサでフィードバックしない)前提で位置制御できるのは楽ちんです。
で、ステッピングモータも基本オープンで(脱調しなければ)何ステップ動かしたから、ここを向いているはずだということができて、しかもグルグル回せる(ラジコンサーボみたいに180度くらいを往復ではなくて)ので、車輪型ロボットの足回りに使ってみたいなと思っていたんですが、DCモータと違い、電気通せば回る(DCモータもそんなんじゃだめだろ?)っていうもんでもないので、使ったことがありませんでした。今回はそんなわけで、とりあえずステッピングモータを単純に回すところまで挑戦です。ここのところI2Cもののセンサが続きましたが、じつはSPIは使ったことがありませんでした。しかし、Arduinoなら、ちょいちょいとつないで、ライブラリを使えばOKです。(いや、素晴らしい。Arduinoあるいはライブラリを用意してくれた人たちに感謝しなくちゃね。)

パラメータとかスピードの設定によっては脱調して回らなくなって、電流ばっかり流れてモータが熱くなったりするので気をつけましょう。(→ 自分)
で、ステッピングモータも基本オープンで(脱調しなければ)何ステップ動かしたから、ここを向いているはずだということができて、しかもグルグル回せる(ラジコンサーボみたいに180度くらいを往復ではなくて)ので、車輪型ロボットの足回りに使ってみたいなと思っていたんですが、DCモータと違い、電気通せば回る(DCモータもそんなんじゃだめだろ?)っていうもんでもないので、使ったことがありませんでした。今回はそんなわけで、とりあえずステッピングモータを単純に回すところまで挑戦です。ここのところI2Cもののセンサが続きましたが、じつはSPIは使ったことがありませんでした。しかし、Arduinoなら、ちょいちょいとつないで、ライブラリを使えばOKです。(いや、素晴らしい。Arduinoあるいはライブラリを用意してくれた人たちに感謝しなくちゃね。)

パラメータとかスピードの設定によっては脱調して回らなくなって、電流ばっかり流れてモータが熱くなったりするので気をつけましょう。(→ 自分)
#include <Arduino.h>

#include <SPI.h>

// ピン定義。
#define PIN_SPI_MOSI 11
#define PIN_SPI_MISO 12
#define PIN_SPI_SCK 13
#define PIN_SPI_SS 10

#define PIN_L6470_SS PIN_SPI_SS

// 関数プロトタイプ。
void L6470_write(unsigned char data);
void L6470_init(void);
void L6470_run(long speed);

// グローバル変数。
long speed = 10000;

void setup()
{
 // ピン設定。
 pinMode(PIN_SPI_MOSI, OUTPUT);
 pinMode(PIN_SPI_MISO, INPUT);
 pinMode(PIN_SPI_SCK, OUTPUT);
 pinMode(PIN_L6470_SS, OUTPUT);

 // SSはHigh(~SSをdisable)状態に。
 digitalWrite(PIN_L6470_SS, HIGH);
 // SPI開始。
 SPI.begin();

 // シリアル通信。
 Serial.begin(9600);

 // L6470の初期化。
 L6470_init();

 Serial.println("Start...");

 // テスト回転。
 L6470_run(speed);
}

void loop()
{

 for (int i = 0; i < 5; i++)
 {
  speed += 10000;
  L6470_run(speed);
  delay (5000);
 }
 for (int i= 0; i < 5; i++)
 {
  speed -= 10000;
  L6470_run(speed);
  delay (5000);
 }

}


void L6470_write(unsigned char data)
{
 // ~SSイネーブル。
 digitalWrite(PIN_L6470_SS, LOW);
 // SPI転送。
 SPI.transfer(data);
 // ~SSディスエーブル。
 digitalWrite(PIN_L6470_SS, HIGH);
}

void L6470_init()
{
 // MAX_SPEED設定。
 /// レジスタアドレス。
 L6470_write(0x07);
 // 最大回転スピード値(10bit)
 L6470_write(0x00);
 L6470_write(0x20);

 // KVAL_HOLD設定。
 /// レジスタアドレス。
 L6470_write(0x09);
 // モータ停止中の電圧設定(8bit)
 L6470_write(0xFF);

 // KVAL_RUN設定。
 /// レジスタアドレス。
 L6470_write(0x0A);
 // モータ定速回転中の電圧設定(8bit)
 L6470_write(0xFF);

 // KVAL_ACC設定。
 /// レジスタアドレス。
 L6470_write(0x0B);
 // モータ加速中の電圧設定(8bit)
 L6470_write(0xFF);

 // KVAL_DEC設定。
 /// レジスタアドレス。
 L6470_write(0x0C);
 // モータ減速中の電圧設定(8bit)
 L6470_write(0xFF);

 // OCD_TH設定。
 /// レジスタアドレス。
 L6470_write(0x13);
 // オーバーカレントスレッショルド設定(4bit)
 L6470_write(0x0F);

 // STALL_TH設定。
 /// レジスタアドレス。
 L6470_write(0x14);
 // ストール電流スレッショルド設定(4bit)
 L6470_write(0x7F);
}

void L6470_run(long speed)
{
 unsigned short dir;
 unsigned long spd;
 unsigned char spd_h;
 unsigned char spd_m;
 unsigned char spd_l;

 // 方向検出。
 if (speed < 0)
 {
  dir = 0x50;
  spd = -1 * speed;
 }
 else
 {
  dir = 0x51;
  spd = speed;
 }

 // 送信バイトデータ生成。
 spd_h = (unsigned char)((0x0F0000 & spd) >> 16);
 spd_m = (unsigned char)((0x00FF00 & spd) >> 8);
 spd_l = (unsigned char)(0x00FF & spd);

 // コマンド(レジスタアドレス)送信。
 L6470_write(dir);
 // データ送信。
 L6470_write(spd_h);
 L6470_write(spd_m);
 L6470_write(spd_l);
}
2012年9月9日日曜日
Arduino、GR-SAKURA、Raspberry Pi でI2C Compassと6DOFを試す
前回からしばらく更新の間があきましたが、GR-SAKURAのI2Cがうまく行かず悩んでいました。結論としては、GR-SAKURAは諦める方向で検討中です。
さて、今回はまず、ストリナのI2CディジタルコンパスをArduino と GR-SAKURA と Raspberry Pi に接続して、方位データの取得を試してみました。Arduino と Raspberry Pi では方位データが取得できましたが、GR-SAKURAではダメ(おかしな値が取得される)でした。ロジアナでみると最後にNACKが返っているんですがコンパス側なのかGR-SAKURA側なのか問題の切り分けはできていません。
同様にもう一つ別のデバイスも試しました。sparkufunの6DOF(三軸ジャイロと三軸加速度センサの組み合わせボード)ですが、これも Arduino と Raspberry Pi は動作して、GR-SAKURAはだめでした。

これまでの各種I2Cデバイスとボードとの組み合わせの勝敗表です。
I2C デバイス
|
Arduino
|
GR-SAKURA
|
Raspberry Pi
|
| 秋月RTC | OK | OK | OK |
| 秋月LCD | OK | NG | NG |
| ストリナLCD | OK | OK(ただし、NACK) | OK |
| ストリナCompass | OK | NG | OK |
| Sparkfun 6DOF | OK | NG | OK |
現状、GR-SAKURAが劣勢というかダメダメです。ただし、上記の結果は、自分の作成したプログラムや使用方法に問題がある可能性が大です。というか、きっとそうなんでしょう。たしか、GR-SAKURA(のライブラリ)はRXマイコンのRIICモジュールを使わずにソフトウェア処理でI2C通信を行なっていると思うのですが、この辺りが関係するのでしょうか。Arduinoとは違い、自分のような素人には GR-SAKURAは向かないようです。一度、ライブラリを使わずにHEWで RIICモジュールを使って試したいところですが、そこまでして GR-SAKURAを使わなくても、Arduinoでいいと思えてきました。日本製マイコンだし、処理能力も高いのでArduinoから乗り換えを考えていましたが、やっぱり簡単に使える方が便利だし。重い処理が必要なら、Arduino + Raspberry Pi ってのもありだし。
で、以下お試しのコード。単純に値を取り出しているだけで使える状態の値には加工してません。実際に使うにはオフセットやらリニアリティ補正やら積分やら結構面倒。機会があればロボットに載せてみたいけど。

Arduinoのコード(スケッチ)
#include <Adruino.h>

#include <Wire.h>

// コンパスに関する定義。
#define COMPASS_ADDRESS (0b0100001)

// ジャイロに関する定義。
#define GYRO_ADDRESS (0xd0 >> 1)
#define GYRO_WHO_AM_I 0x00
#define GYRO_SMPLRT_DEV 0x15
#define GYRO_DLPF_FS 0x16
#define GYRO_INT_CFG 0x17
#define GYRO_INT_STATUS 0x1A
#define GYRO_TEMP_OUT_H 0x1B
#define GYRO_TEMP_OUT_L 0x1C
#define GYRO_XOUT_H 0x1D
#define GYRO_XOUT_L 0x1E
#define GYRO_YOUT_H 0x1F
#define GYRO_YOUT_L 0x20
#define GYRO_ZOUT_H 0x21
#define GYRO_ZOUT_L 0x22
#define GYRO_PWR_MGM 0x3E

// 加速度センサに関する定義。
#define ACC_ADDRESS (0xa6 >> 1)
#define ACC_POWER_CTL 0x2D
#define ACC_DATA_X0 0x32
#define ACC_DATA_X1 0x33
#define ACC_DATA_Y0 0x34
#define ACC_DATA_Y1 0x35
#define ACC_DATA_Z0 0x36
#define ACC_DATA_Z1 0x37

// 関数プロトタイプ。
int getCompass(void);
void getGyro(short *x, short *y, short *z);
void initAcc(void);
void getAcc(short *x, short *y, short *z);

//
unsigned char buf[8];

void setup()
{
 // シリアルポートを9600bpsで開始。
    Serial.begin(9600);
    // 受信バッファにデータが入るまで待機。
    while (Serial.available() == 0);
    Serial.println("Initializing...");
    // 一旦、受信バッファにデータがあれば、
    if (Serial.available() > 0) {
        // 読み込んで、廃棄。
        char c = Serial.read();
    }
    Serial.println("Initializing...Please wait...");
    delay(500);

    // Bus-MasterとしてI2Cを開始。
    Wire.begin();

 // 加速度センサの初期化。
 initAcc();
}

void loop()
{
 int cmps;
 short gyroX, gyroY, gyroZ;
 short accX, accY, accZ;

 cmps = getCompass();
 getGyro(&gyroX, &gyroY, &gyroZ);
 getAcc(&accX, &accY, &accZ);

 Serial.print("COMPASS:");
 Serial.println(cmps, DEC);
 Serial.print("GYRO X:");
 Serial.print(gyroX, DEC);
 Serial.print(" Y:");
 Serial.print(gyroY, DEC);
 Serial.print(" Z:");
 Serial.print(gyroZ, DEC);
 Serial.println();
 Serial.print("ACC X:");
 Serial.print(accX, DEC);
 Serial.print(" Y:");
 Serial.print(accY, DEC);
 Serial.print(" Z:");
 Serial.print(accZ, DEC);
 Serial.println();
  delay(200);
}

int getCompass(void)
{
 int data;

 // I2C通信開始。
    Wire.beginTransmission(COMPASS_ADDRESS);
    // Get dataコマンド送信。
    Wire.write('A');
    //Wire.write(0x41);
    // キューの送信。
    Wire.endTransmission();

    // データ要求。
    Wire.requestFrom(COMPASS_ADDRESS, 2);
    // データ受信。
    for (int i = 0; i < 2; i++) {
        while (Wire.available() == 0);
        buf[i] = Wire.read();
    }

    // データ変換。
    data = (unsigned short)buf[0];
    data = (data << 8) + (unsigned short)buf[1];

 return data;
}

void getGyro(short *x, short *y, short *z)
{
    // I2C通信開始。
    Wire.beginTransmission(GYRO_ADDRESS);
    // レジスタアドレスGYRO_TEMP_OUT_Hを指定。
    Wire.write(GYRO_TEMP_OUT_H);
    // キューの送信。
    Wire.endTransmission();

    delay(1);

    // I2C通信開始。
    Wire.beginTransmission(GYRO_ADDRESS);
    // データ要求。
    Wire.requestFrom(GYRO_ADDRESS, 8);
    // データ受信。
    for (int i = 0; i < 8; i++) {
        while (Wire.available() == 0);
        buf[i] = Wire.read();
    }
    Wire.endTransmission();

    *x = (((short)buf[2]) << 8) | buf[3];
    *y = (((short)buf[4]) << 8) | buf[5];
    *z = (((short)buf[6]) << 8) | buf[7];
}

void initAcc(void)
{
 Wire.beginTransmission(ACC_ADDRESS);
    Wire.write(ACC_POWER_CTL);
    Wire.write(0b00001000);
    Wire.endTransmission();
 Serial.println("Accelerometer Initialized.");
}

void getAcc(short *x, short *y, short *z)
{
 // I2C通信開始。
    Wire.beginTransmission(ACC_ADDRESS);
    // レジスタアドレスACC_DATA_X0 を指定。
    Wire.write(ACC_DATA_X0);
    // キューの送信。
    Wire.endTransmission();

    delay(1);

    // I2C通信開始。
    Wire.beginTransmission(ACC_ADDRESS);
    // データ要求。
    Wire.requestFrom(ACC_ADDRESS, 6);
    // データ受信。
    for (int i = 0; i < 6; i++) {
        while (Wire.available() == 0);
        buf[i] = Wire.read();
    }
    Wire.endTransmission();

    *x = (((short)buf[1]) << 8) | buf[0];
    *y = (((short)buf[3]) << 8) | buf[2];
    *z = (((short)buf[5]) << 8) | buf[4];
}

Raspberry Pi のコード(例によってWiringPiのdelay使用)
#include <stdio.h>
#include <stdlib.h>
#include <time.h>
#include <unistd.h>

#include <linux/i2c-dev.h>
#include <fcntl.h>
#include <sys/ioctl.h>

#include <wiringPi.h>


#define COMPASS_ADDRESS (0b0100001)
#define GYRO_ADDRESS (0xd0 >> 1)
#define ACCELEROMETER_ADDRESS (0xa6 >> 1)

// 関数プロトタイプ。
int getCompass(int addr);
void getGyro(int addr, short *x, short *y, short *z);
void initAcc(int addr);
void getAcc(int adr, short *x, short *y, short *z);

//
char *i2cFileName = "/dev/i2c-0"; // I2Cドライバファイル名。

int main(int argc, char **argv)
{

 int cmpsAddr = COMPASS_ADDRESS; // I2C Compass のアドレス。
 int gyroAddr = GYRO_ADDRESS;  // I2C Gyro のアドレス。
 int accAddr = ACCELEROMETER_ADDRESS; // 加速度センサのアドレス。
 unsigned short cmps;
 short gyroX, gyroY, gyroZ;
 short accX, accY, accZ;

 printf("***** start test program *****\n");

 initAcc(accAddr);

 while(1)
 {
  // コンパスの値取得。
  cmps = getCompass(cmpsAddr);
  // ジャイロの値取得。
  getGyro(gyroAddr, &gyroX, &gyroY, &gyroZ);
  // 加速度センサの値取得。
  getAcc(accAddr, &accX, &accY, &accZ);

  printf("COMPASS:%d\n", cmps);
  printf("GYRO X:%d, Y:%d, Z:%d\n", gyroX, gyroY, gyroZ);
  printf("ACC X:%d, Y:%d, Z:%d\n", accX, accY, accZ);

  delay(200);
 }

 return 0;
}

int getCompass(int addr)
{
 int cmps; // ファイルディスクリプタ。
 unsigned char buf[2];
 int deg;

 // I2CポートをRead/Write属性でオープン。
 if ((cmps = open(i2cFileName, O_RDWR)) < 0)
 {
  printf("Faild to open i2c port\n");
  exit(1);
 }

 // 通信先アドレスの設定。
 if (ioctl(cmps, I2C_SLAVE, addr) < 0)
 {
  printf("Unable to get bus access to talk to slave\n");
  exit(1);
 }

 buf[0] = 'A';
 if ((write(cmps, buf, 1)) != 1) {
  printf("Error writing to Compass\n");
  exit(1);
 }

 delay(1);

 // データ読み込み。
 if (read(cmps, buf, 2) != 2)
 {
  printf("Uneble to read from Compass\n");
  exit(1);
 }

 // クローズ。
 close(cmps);

 deg = (unsigned short)buf[0];
 deg = (deg << 8) + (unsigned short)buf[1];

 return deg;
}

void getGyro(int addr, short *x, short *y, short *z)
{
 int gyro; // ファイルディスクリプタ。
 unsigned char buf[8];

 // I2CポートをRead/Write属性でオープン。
 if ((gyro = open(i2cFileName, O_RDWR)) < 0)
 {
  printf("Faild to open i2c port\n");
  exit(1);
 }

 // 通信先アドレスの設定。
 if (ioctl(gyro, I2C_SLAVE, addr) < 0)
 {
  printf("Unable to get bus access to talk to slave\n");
  exit(1);
 }

 buf[0] = 0x1b;
 if ((write(gyro, buf, 1)) != 1) {
  printf("Error writing to Gyro\n");
  exit(1);
 }

 delay(1);

 // データ読み込み。
 if (read(gyro, buf, 8) != 8)
 {
  printf("Uneble to read from Gyro\n");
  exit(1);
 }

 // クローズ。
 close(gyro);

 *x = (((short)buf[2]) << 8) | buf[3];
    *y = (((short)buf[4]) << 8) | buf[5];
    *z = (((short)buf[6]) << 8) | buf[7];
}


void initAcc(int addr)
{
 int acc; // ファイルディスクリプタ。
 unsigned char buf[2];

 // I2CポートをRead/Write属性でオープン。
 if ((acc = open(i2cFileName, O_RDWR)) < 0)
 {
  printf("Faild to open i2c port\n");
  exit(1);
 }

 // 通信先アドレスの設定。
 if (ioctl(acc, I2C_SLAVE, addr) < 0)
 {
  printf("Unable to get bus access to talk to slave\n");
  exit(1);
 }

 buf[0] = 0x2d;
 buf[1] = 0b00001000;
 if ((write(acc, buf, 2)) != 2) {
  printf("Error writing to Accelerometer\n");
  exit(1);
 }

 delay(1);

 // クローズ。
 close(acc);
}

void getAcc(int addr, short *x, short *y, short *z)
{
 int acc; // ファイルディスクリプタ。
 unsigned char buf[6];

 // I2CポートをRead/Write属性でオープン。
 if ((acc = open(i2cFileName, O_RDWR)) < 0)
 {
  printf("Faild to open i2c port\n");
  exit(1);
 }

 // 通信先アドレスの設定。
 if (ioctl(acc, I2C_SLAVE, addr) < 0)
 {
  printf("Unable to get bus access to talk to slave\n");
  exit(1);
 }

 buf[0] = 0x32;
 if ((write(acc, buf, 1)) != 1) {
  printf("Error writing to Accelerometer\n");
  exit(1);
 }

 delay(1);

 // データ読み込み。
 if (read(acc, buf, 6) != 6)
 {
  printf("Uneble to read from Accelereometer\n");
  exit(1);
 }

 // クローズ。
 close(acc);

 *x = (((short)buf[1]) << 8) | buf[0];
    *y = (((short)buf[3]) << 8) | buf[2];
    *z = (((short)buf[5]) << 8) | buf[4];
}
2012年8月29日水曜日
Raspberry Pi で I2C その2 ストリナI2C LCD
前回、GR-SAKURAでストロベリー・リナックスのI2C LCDが動かせたので、この前の Raspberry Piで秋月のI2C RTCを動かしたのとあわせて、当然、Raspberry Pi でこのI2C LCDは動くだろうと考えたのですが、甘かったです。単純に差し替えて動いてはくれませんでした。

今回はRaspduinoアダプタは使わずに、Raspberry PiのGPIO端子から直接結線して試したのですが、文字が表示されず、というか、初期化のコマンドのところでI2Cへ出力する関数がエラーを返してきます。ロジアナで覗くと一発目のアドレス送信でNACKが返って(ACKにならない)いたり、ACKが返ってもタイミングがずれているように見えます。GR-SAKURAでは動いて、Raspberry PiではダメなんだからRaspberry Pi側の問題?切り分けのために、パソコンからI2C信号を送れるアダプタで試したところ同じ結果になりました。原因がわからないまま、悶々としつつ、このアダプタのマニュアルとかを読んでいたら、「プルアップ抵抗が内蔵されています。」の記述が。そういえば、Raspberry Piも(設定で切り替えられると思うが)デフォルトで内部プルアップだったはず。外部(ブレッドボード)上にもプルアップ抵抗(今回は1kΩ)をつけてあるのが逆効果なのか?でも、GR-SAKURAの時は普通に動いていたけど・・・。(GR-SAKURAはデフォルト内部プルアップだけど、さらに外付けしたほうが安定ってライブラリの説明に書いてあった。)
まあ、ものは試しなので、プルアップ抵抗を外して試してみよう・・・。って、動いたよ。

ふ~ん。そういうもんなの。Raspberry Pi 側の内蔵プルアップがあるのに外部に(しかも1kΩだと低すぎ?本来2.2kΩとか?)プルアップを余計につけてしまうと並列になった抵抗をLCD側がACK状態にドライブできない(あるいはタイミングが遅れる)ということでしょうか。
と、いうわけで。以下、ソース。例によってdelay関数でwiringPiを使用。
と、いうわけで。以下、ソース。例によってdelay関数でwiringPiを使用。
#include <stdio.h>
#include <stdlib.h>
#include <time.h>
#include <unistd.h>

#include <linux/i2c-dev.h>
#include <fcntl.h>
#include <sys/ioctl.h>

#include <wiringPi.h>


#define LCD_ADDRESS (0b0111110)
#define LCD_CONTRAST 100

#define LCD_RS_CMD (0x00)
#define LCD_RS_DATA (0x40)
#define LCD_CMD_CLEAR (0x01)
#define LCD_CMD_HOME (0x03)

// 関数プロトタイプ宣言。
void LCD_init(int fd);
void LCD_write(unsigned char rs, unsigned char data, int fd);
void LCD_clear(int fd);
void LCD_setCursor(unsigned char col, unsigned char row, int fd);
void LCD_putc(unsigned char c, int fd);
void LCD_puts(char *str, int fd);

int main(int argc, char **argv)
{
 int lcd;       // ファイルディスクリプタ。
 char *i2cFileName = "/dev/i2c-0"; // I2Cドライバファイル名。
 int lcdAddress = LCD_ADDRESS;  // I2C LCD のアドレス。

 printf("***** start i2c lcd test program *****\n");

 // I2CポートをRead/Write属性でオープン。
 if ((lcd = open(i2cFileName, O_RDWR)) < 0)
 {
  printf("Faild to open i2c port\n");
  exit(1);
 }

 // 通信先アドレスの設定。
 if (ioctl(lcd, I2C_SLAVE, lcdAddress) < 0)
 {
  printf("Unable to get bus access to talk to slave\n");
  exit(1);
 }

 delay(100);

 // LCD初期化。
 LCD_init(lcd);

 // メッセージ表示。
    LCD_setCursor(0, 0, lcd);
    LCD_puts("Hello!!", lcd);
    LCD_setCursor(5, 1, lcd);
    LCD_puts("I2C LCD!!", lcd);

 return 0;
}

void LCD_init(int fd)
{
 delay(40);
 // Function Set。8bit bus mode, 2-line mode,normal font,normal instruction mode。
    LCD_write(LCD_RS_CMD, 0b00111000, fd);
    // Function Set。extension instruction modeへ。
    LCD_write(LCD_RS_CMD, 0b00111001, fd);
    // Internal OSC frequency(extension instruction mode)設定。
    LCD_write(LCD_RS_CMD, 0b00010100, fd);
    // Contrast set(extension instruction mode)。コントラスト値下位4bit設定。
    LCD_write(LCD_RS_CMD, 0b01110000 | (LCD_CONTRAST & 0xF), fd);
    // Power/ICON/Contrast set(extension instruction mode)。
    // アイコン On,booster On,コントラスト値上位2bit設定。
    LCD_write(LCD_RS_CMD, 0b01011100 | ((LCD_CONTRAST >> 4) & 0x3), fd);
    // Follower control。internal follower on,
    LCD_write(LCD_RS_CMD, 0b01101100, fd);
    // 時間待ち。
    delay(300);

    // Function Set。normal instruction mode。
    LCD_write(LCD_RS_CMD, 0b00111000, fd);
    // Display On/Off。Display Onに設定。
    LCD_write(LCD_RS_CMD, 0b00001100, fd);
    // Clear Display。
    LCD_write(LCD_RS_CMD, 0b00001100, fd);
    // 時間待ち。
    delay(2);
}

void LCD_write(unsigned char rs, unsigned char data, int fd)
{
    unsigned char buf[2];

    if (rs == LCD_RS_CMD || rs == LCD_RS_DATA)
    {
        // LCD_RS_CMD ならコマンドモード。LCD_RS_DATA ならデータモード。

  buf[0] = rs;
  buf[1] = data;
  if (write(fd, buf, 2) != 2)
  {
   printf("Error writeing to i2c slave1\n");
  }
    }
    else
    {
        // rsの指定がLCD_RS_CMD,LCD_RS_DATA以外ならなにもしない。
    }
}

void LCD_clear(int fd)
{
    LCD_write(LCD_RS_CMD, LCD_CMD_CLEAR, fd);
    delay(2);
    LCD_write(LCD_RS_CMD, LCD_CMD_HOME, fd);
    delay(2);
}

void LCD_setCursor(unsigned char col, unsigned char row, int fd)
{
    unsigned char offset[] = {0x00, 0x40};

    if (row > 1)    row = 1;
    if (col > 16)    col = 16;

    LCD_write(LCD_RS_CMD, 0x80 | (col + offset[row]), fd);
}

void LCD_putc(unsigned char c, int fd)
{
    LCD_write(LCD_RS_DATA, c, fd);
}

void LCD_puts(char *str, int fd)
{
    int i;
    for (i = 0; i < 16; i++)
    {
        if (str[i] == 0x00)
        {
            break;
        }
        else
        {
            LCD_putc((unsigned int)str[i], fd);
        }
    }
}
前日まで悩んでたのはなんだったんだ。ま、結果オーライということで。昨夜、飲んだら眠くなって早く寝過ぎて、今朝、2時前に目が覚めて、これに手を付けたんだけど、早起きは三文の得、ということで・・・。
2012年8月26日日曜日
GR-SAKURA I2C編3 ストリナI2C LCD
今回は、GR-SAKURAでストロベリー・リナックスさんのI2C LCDを動かしてみました。というのも、以前に秋月のI2C LCDがArduinoでは簡単に動いたのに、SAKURAでは失敗したので、(原因追求するのも面倒なので)別のI2C LCD試してみようという、安易な発想からです。

で結論。あっさり動いた。

ソースは、前回のもののLCDのI2Cアドレスとか初期化の制御コマンドの辺りを変更しただけのもの。
#define RXDUINO

#ifdef RXDUINO
#include <rxduino.h>
#else
#include <Arduino.h>
#endif

#include <Wire.h>

#define LCD_ADDRESS    (0b0111110)
#define LCD_CONTRAST    100

#define LCD_RS_CMD    (0x00)
#define LCD_RS_DATA    (0x40)
#define LCD_CMD_CLEAR    (0x01)
#define LCD_CMD_HOME    (0x03)

// 関数プロトタイプ宣言。
void LCD_init();
void LCD_write(uint8_t rs, uint8_t data);
void LCD_clear();
void LCD_setCursor(byte col, byte row);
void LCD_putc(uint8_t c);
void LCD_puts(char *str);


void setup()
{
    // シリアルポートを9600bpsで開始。
    Serial.begin(9600);
    // 受信バッファにデータが入るまで待機。
    while (Serial.available() == 0);
    Serial.println("Initializing...");
    // 一旦、受信バッファにデータがあれば、
    if (Serial.available() > 0) {
        // 読み込んで、廃棄。
        char c = Serial.read();
    }

    // Bus-MasterとしてI2Cを開始。
    Wire.begin();

    delay(500);

    // LCDの初期化。
    LCD_init();

    // メッセージ表示。
    LCD_setCursor(0, 0);
    LCD_puts("Hello!!");
    LCD_setCursor(5, 1);
    LCD_puts("I2C LCD!!");

}

void loop()
{

}

// LCD初期化。
void LCD_init()
{
    delay(40);
    // Function Set。8bit bus mode, 2-line mode,normal font,normal instruction mode。
    LCD_write(LCD_RS_CMD, 0b00111000);
    // Function Set。extension instruction modeへ。
    LCD_write(LCD_RS_CMD, 0b00111001);
    // Internal OSC frequency(extension instruction mode)設定。
    LCD_write(LCD_RS_CMD, 0b00010100);
    // Contrast set(extension instruction mode)。コントラスト値下位4bit設定。
    LCD_write(LCD_RS_CMD, 0b01110000 | (LCD_CONTRAST & 0xF));
    // Power/ICON/Contrast set(extension instruction mode)。
    // アイコン On,booster On,コントラスト値上位2bit設定。
    LCD_write(LCD_RS_CMD, 0b01011100 | ((LCD_CONTRAST >> 4) & 0x3));
    // Follower control。internal follower on,
    LCD_write(LCD_RS_CMD, 0b01101100);
    // 時間待ち。
    delay(300);

    // Function Set。normal instruction mode。
    LCD_write(LCD_RS_CMD, 0b00111000);
    // Display On/Off。Display Onに設定。
    LCD_write(LCD_RS_CMD, 0b00001100);
    // Clear Display。
    LCD_write(LCD_RS_CMD, 0b00001100);
    // 時間待ち。
    delay(2);
}

// LCDへデータ書き込み。
void LCD_write(uint8_t rs, uint8_t data)
{
    int rtnValue;

    if (rs == LCD_RS_CMD || rs == LCD_RS_DATA)
    {
        // LCD_RS_CMD ならコマンドモード。LCD_RS_DATA ならデータモード。

        // LCDへの送信準備開始。
        Wire.beginTransmission(LCD_ADDRESS);
        // モード(RS)送信。
        Wire.write(rs);
        // データ送信。
        Wire.write(data);
        // キューの送信。通信終了。
        rtnValue = Wire.endTransmission();
        Serial.print(rtnValue);

    }
    else
    {
        // rsの指定が0x00,0x80以外ならなにもしない。
    }
}

void LCD_clear()
{
    LCD_write(LCD_RS_CMD, LCD_CMD_CLEAR);
    delay(2);
    LCD_write(LCD_RS_CMD, LCD_CMD_HOME);
    delay(2);
}

void LCD_setCursor(byte col, byte row)
{
    byte offset[] = {0x00, 0x40};

    if (row > 1)    row = 1;
    if (col > 16)    col = 16;

    LCD_write(LCD_RS_CMD, 0x80 | (col + offset[row]));
}

void LCD_putc(uint8_t c)
{
    LCD_write(LCD_RS_DATA, c);
}

void LCD_puts(char *str)
{
    int i;
    for (i = 0; i < 16; i++)
    {
        if (str[i] == 0x00)
        {
            break;
        }
        else
        {
            LCD_putc((unsigned int)str[i]);
        }
    }
}
いつものように RXDUINO のdefineをコメントアウトしてArduinoと兼用できるような書き方にしていますが、今回はArudino側での動作確認はしていませんので、あしからず。
しかし、じゃあ、なんで、秋月のI2C LCDは動かないのさ、ということになるんですが。まあ、しらべる元気もないんだけど・・・。あした、そのうち、いつか・・・調べようかな・・・。明日っていつの明日よっ?
もうひとつ気になることが・・・。上のソースのI2Cに送信してendTranmission()する戻り値をコンソールに出力しているんだけど、全部"2"(アドレス送信時にNACKを受信)となっているんだけど、いいのかな?成功(ACKを受信というかLCD側が応答)せずに文字だけ表示している?

しかし、じゃあ、なんで、秋月のI2C LCDは動かないのさ、ということになるんですが。まあ、しらべる元気もないんだけど・・・。あした、そのうち、いつか・・・調べようかな・・・。明日っていつの明日よっ?
もうひとつ気になることが・・・。上のソースのI2Cに送信してendTranmission()する戻り値をコンソールに出力しているんだけど、全部"2"(アドレス送信時にNACKを受信)となっているんだけど、いいのかな?成功(ACKを受信というかLCD側が応答)せずに文字だけ表示している?

2012年8月23日木曜日
Raspberry Pi で I2C その1 秋月RTCモジュール
Raspberry Pi 用GPIOアダプタ(Raspduino) で Arduino や GR-SAKURA のように秋月のI2C接続RTCが使えるかどうかを試してみました。

下準備として ここ の記述を参考に以下を行いました。ただし、自分の環境は色々なものをインストールしているので、何がどう影響(良くも悪くも)しているかが正直わからないんですが・・・
まず、/etc/modules に
i2c-dev
の一行を追加して、/etc/modprobe.d/raspi-blacklist.conf の
blacklist i2c-bcm2708
の先頭に#をつけてコメントアウト。一旦、再起動後に
sudo apt-get install i2c-tools
で i2c-tools をインストールしました。
動作確認に使ったソースはこんな感じ。ただし、delay関数を使うために wiringPiのライブラリを使用しています。

どうやら、RTCから情報を取得できているようです。

下準備として ここ の記述を参考に以下を行いました。ただし、自分の環境は色々なものをインストールしているので、何がどう影響(良くも悪くも)しているかが正直わからないんですが・・・
まず、/etc/modules に
i2c-dev
の一行を追加して、/etc/modprobe.d/raspi-blacklist.conf の
blacklist i2c-bcm2708
の先頭に#をつけてコメントアウト。一旦、再起動後に
sudo apt-get install i2c-tools
で i2c-tools をインストールしました。
動作確認に使ったソースはこんな感じ。ただし、delay関数を使うために wiringPiのライブラリを使用しています。
#include <stdio.h>
#include <stdlib.h>
#include <time.h>
#include <unistd.h>

#include <linux/i2c-dev.h>
#include <fcntl.h>
#include <sys/ioctl.h>

#include <wiringPi.h>


int main(int argc, char **argv)
{
 int rtc;       // ファイルディスクリプタ。
 char *i2cFileName = "/dev/i2c-0"; // I2Cドライバファイル名。
 int rtcAddress = 0xa2 >> 1;   // I2C LCD のアドレス。右1bitシフト。
 unsigned char buf[16];    // バッファ。

 printf("***** start i2c test program *****\n");
 printf("Initializing RTC unit... Please wait\n");
 delay(1000);

 // I2CポートをRead/Write属性でオープン。
 if ((rtc = open(i2cFileName, O_RDWR)) < 0)
 {
  printf("Faild to open i2c port\n");
  exit(1);
 }

 // 通信先アドレスの設定。
 if (ioctl(rtc, I2C_SLAVE, rtcAddress) < 0)
 {
  printf("Unable to get bus access to talk to slave\n");
  exit(1);
 }

 // RTC初期化。
 delay(15);
 // はじめにアドレス0x00を指定。次からはオートインクリメント。
 buf[0] = 0x00;
 // コントロールレジスタ1。
 buf[1] = 0x00;
 // コントロールレジスタ2。
 buf[2] = 0x00;
 // 秒レジスタ。とりあえず、58秒。
 buf[3] = 0x58;
 // 分レジスタ。とりあえず、59分。
 buf[4] = 0x59;
 // 時レジスタ。とりあえず、23時。
 buf[5] = 0x23;
 // 日レジスタ。とりあえず、23日。
 buf[6] = 0x23;
 // 曜日レジスタ。とりあえず、木曜日。
 buf[7] = 0x04;
 // 月レジスタ。とりあえず、8月。
 buf[8] = 0x08;
 // 年レジスタ。取りあえず、12年。
 buf[9] = 0x12;
 // アラーム設定。なし。
 buf[11] = 0x00;
 buf[12] = 0x00;
 buf[13] = 0x00;
 // Clock出力設定。1Hz。
 buf[14] = 0x83;
 if (write(rtc, buf, 15) != 15)
 {
  printf("Error writeing to i2c slave\n");
  exit(1);
 }
 delay(20);
 printf("RTC Initialized.\n");

 int i;
 for (i = 0; i < 20; i++)
 {
  // データ要求ダミーコマンド送信。
  buf[0] = 0;
  if ((write(rtc, buf, 1)) != 1) {
   printf("Error writing to i2c slave\n");
   exit(1);
  }
  // データ読み込み。
  if (read(rtc, buf, 16) != 16)
  {
   printf("Uneble to read\n");
   exit(1);
  }

  // 西暦年。以下数値はBCD。
  printf("20");
  printf("%x", buf[8]);
  printf("/");
  // 月。下位9bit。
  printf("%x", buf[7] & 0x1f);
  printf("/");
  // 日。下位10bit。
  printf("%x", buf[5] & 0x3f);
  printf(" ");
  // 曜日。
  switch (buf[6] & 0x07) {
  case 0:
   printf("Sun");
   break;
  case 1:
   printf("Mon");
   break;
  case 2:
   printf("Tue");
   break;
  case 3:
   printf("Wed");
   break;
  case 4:
   printf("Thr");
   break;
  case 5:
   printf("Fri");
   break;
  case 6:
   printf("Sat");
   break;
  default:
   printf("   ");
   break;
  }
  printf("   ");
  // 時。
  printf("%x", buf[4] & 0x3f);
  printf(":");
  // 分。
  printf("%x", buf[3] & 0x7f);
  printf(":");
  // 秒。
  printf("%x", buf[2] & 0x7f);
  printf("\n");

  delay(500);
 }

 return 0;
}

どうやら、RTCから情報を取得できているようです。
登録:
投稿 (Atom)